Track Scott's RV-7 flight

Friday, October 16, 2009

Airworthiness Certificate Application


After all of the blood (yes, I have drawn blood - several times), sweat (of course), and tears (no, you must be thinking of someone else) I finally reached that milestone. All of the pieces are in place, the plane is essentially complete, and it's time to let the FAA take a look at the final product.

OK, let's get real about this. The FAA doesn't really look at the final product. They allow a Designated Airworthiness Representative (DAR) to charge me about $300 to come out and look at my plane. He'll inspect for general workmanship, look for any errors or omissions that are glaringly obvious. But it's not his job, nor do I expect him to find every mistake or error that I may have made. In the end, I built my RV. I'm the "manufacturer". And I'm responsible.

So really, the DAR is going to come out to my hangar, spend a half hour poking through the inspection ports, the engine compartment, the panel, the wiring, etc, and then he's going to make sure that I have completed my governmental duties. He's going to look at (drum roll please...) the paperwork!!!

Yes! We all know that there is not an airplane out there that can't possibly fly unless the associated paperwork results in three chopped down trees, and weighs more than the airplane that the paperwork represents. So I've done my best to comply. I've documented the major steps involved in building. I've established logbooks to track maintenance and repairs to the airframe, the engine, and the propeller. Yes, three separate logbooks that will follow their respective equipment forever! I've filled out FAA forms in triplicate. I've had forms notarized. I've written notes to myself on paper napkins. I've written notes to myself on my hand (but the FAA won't allow me to submit those notes - something about chopping down trees.)

So now it's all been completed, notarized, and faxed off to the FAA for their approval. After the Beast has been satisfied, they will send the information along to the DAR, who will finish the inspection at my hangar. The DAR will issue two very important documents. First is my Airworthiness Certificate. This document is the FAA's admission that my little project is actually permitted to have air underneath the wheels. The second document is called "operating limitations", and spells out the limitations that the FAA puts on flight of each aircraft. My Op Limits will have two phases.

Phase I will cover the first 40 hours of flight, and require me to fly in a specific geographic area while testing the flight envelope, proving the reliability of the airframe and the engine, etc. Phase II will begin at 40.1 hours, and will allow me to carry passengers, fly VFR day or night, perform aerobatics, and fly anywhere and land at (almost) any airport.

Weight and Balance complete


Last week, I was finally able to get just about everything attached, bolted, screwed, installed, or just placed in it's proper position and location on my RV-7. Time to do the weight and balance. This is the final step, after everything is completed, to make sure that the airplane comes in at a proper weight, and that it balances at a point that will make it safe to fly.

The plane is leveled by raising the tailwheel until the fuselage is exactly level from front to tail. It is also leveled side-to-side by letting air out of one tire until the fuselage is absolutely level.

I borrowed a set of aviation grade scales from my local EAA chapter (EAA Chap 818), and with a little help from Marlin, I was able to get excellent results. My RV-7 came in with an empty weight of 1050 lbs, and the Center of Gravity came in about 1/4" behind where the factory recommends. That's good! I built light, installed lightweight instruments (Dynon), lightweight starter, and didn't go overboard with the interior seats and upholstery.

Friday, September 18, 2009

West Yellowstone Airport and Campsite


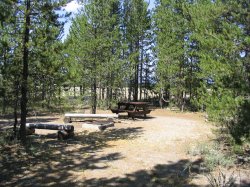
Here's another location that looked like fun to fly to. It's a campground that is on the West Yellowstone airport and maintained by the Montana Dept of Transportation. Looks like a fun place to pitch a tent and enjoy a campfire! Several RVers have commented on this camping area - nice place for an RV gathering.

Tuesday, June 2, 2009

How's it look now?


I've gone through a very steep learning curve, but I think that I've almost figured out how to paint an airplane. Too bad I've already (almost) finished painting before I figured it out!:D

This is a picture of my airplane taken at dusk this evening - sorry about the poor light but I really only did it so you can't see all of the mistakes and flaws!

The wings are done and hiding in a corner of the shop. Just need to finish off a couple of small items, and then start moving to the airport!

Tuesday, May 12, 2009

APRS is up and running (What's this?)

OK, My APRS is now up and running. Scroll down to the bottom of the page to "Track Scott" to see where I am. Click on the vehicle to get current location information, speed, and altitude (in case I'm flying).

What is APRS? It stands for Automatic Packet Reporting System. It's a Ham Radio application that takes a GPS signal, converts it into a Ham Radio signal which is then transmitted real-time. The transmitted signal is then received by multiple stations called "I-Gates". These are simply Ham Radio receivers that send the signal directly to the sound card on a computer, which then decodes the signal and sends it (as a packet) onto the internet. Hence, anyone with access to the internet can track someone who is using APRS by simply looking up that person's call sign.

The map at the bottom of my blog is not very powerful. You can get more information by going to http://www.aprs.fi/ where you can search for all APRS activity in an area, search for a specific user, etc. My callsign is "N957RV-7" - which is the N Number for my airplane.

Friday, April 24, 2009

Flying Destination Wish List #1


Gold Beach, OR
Gold Beach has a neat little airport right on the ocean beach in southern Oregon. The town of Gold Beach is located at the mouth of Rogue River, which is known for it's Jet Boat excursions and the Siskiyou National Forest.
There's a nice resort style hotel located within a mile of the airport (Gold Beach Resort).

Sunday, April 19, 2009

Painting an RV-7 Fuselage Part 1


Caution being the best way to approach a complex task, I began painting my RV-7 on all of the small pieces, such as the gear fairings, the access covers, and then moving up to the elevators and ailerons and flaps. I'm almost done with the wings, and then I'll move on to the fuselage.


The wing gets an initial coat of primer, and then a full coat of "Idaho Snow" base color. The picture at right is the base color.


After a day or so of drying, the wing gets taped off, and then the trim colors are sprayed. I'm using a maroon and "Dawn Grey" for my trim colors. Well, those are the trim colors for the wing anyways. It will be just the opposite on the fuselage, where the main color will be maroon, with trim colors of Dawn Grey and Idaho Snow.


This picture is kind of dark, but you can see the trim scheme. The part of the wing that is missing is the fuel tank. It gets painted at the same time as the wing so that the colors tints match and the trim lines actually line up!


With the majority of the "small stuff" painted, now it's time to move on to the fuselage. Today, I used an acid etch to clean the fuselage skin. The acid actually removes a layer of very pure aluminum from the skin of the airplane and creates microscopic pits in the underlying layer. Primer is then sprayed onto the skins, where it mechanically bonds to the pits. The color coats are finally sprayed and bond to the primer. When the aluminum skin is etched, the fuselage looks like crap! But the primer will go on tomorrow and then it will begin to look presentable again!